One Click Demo Import
Description
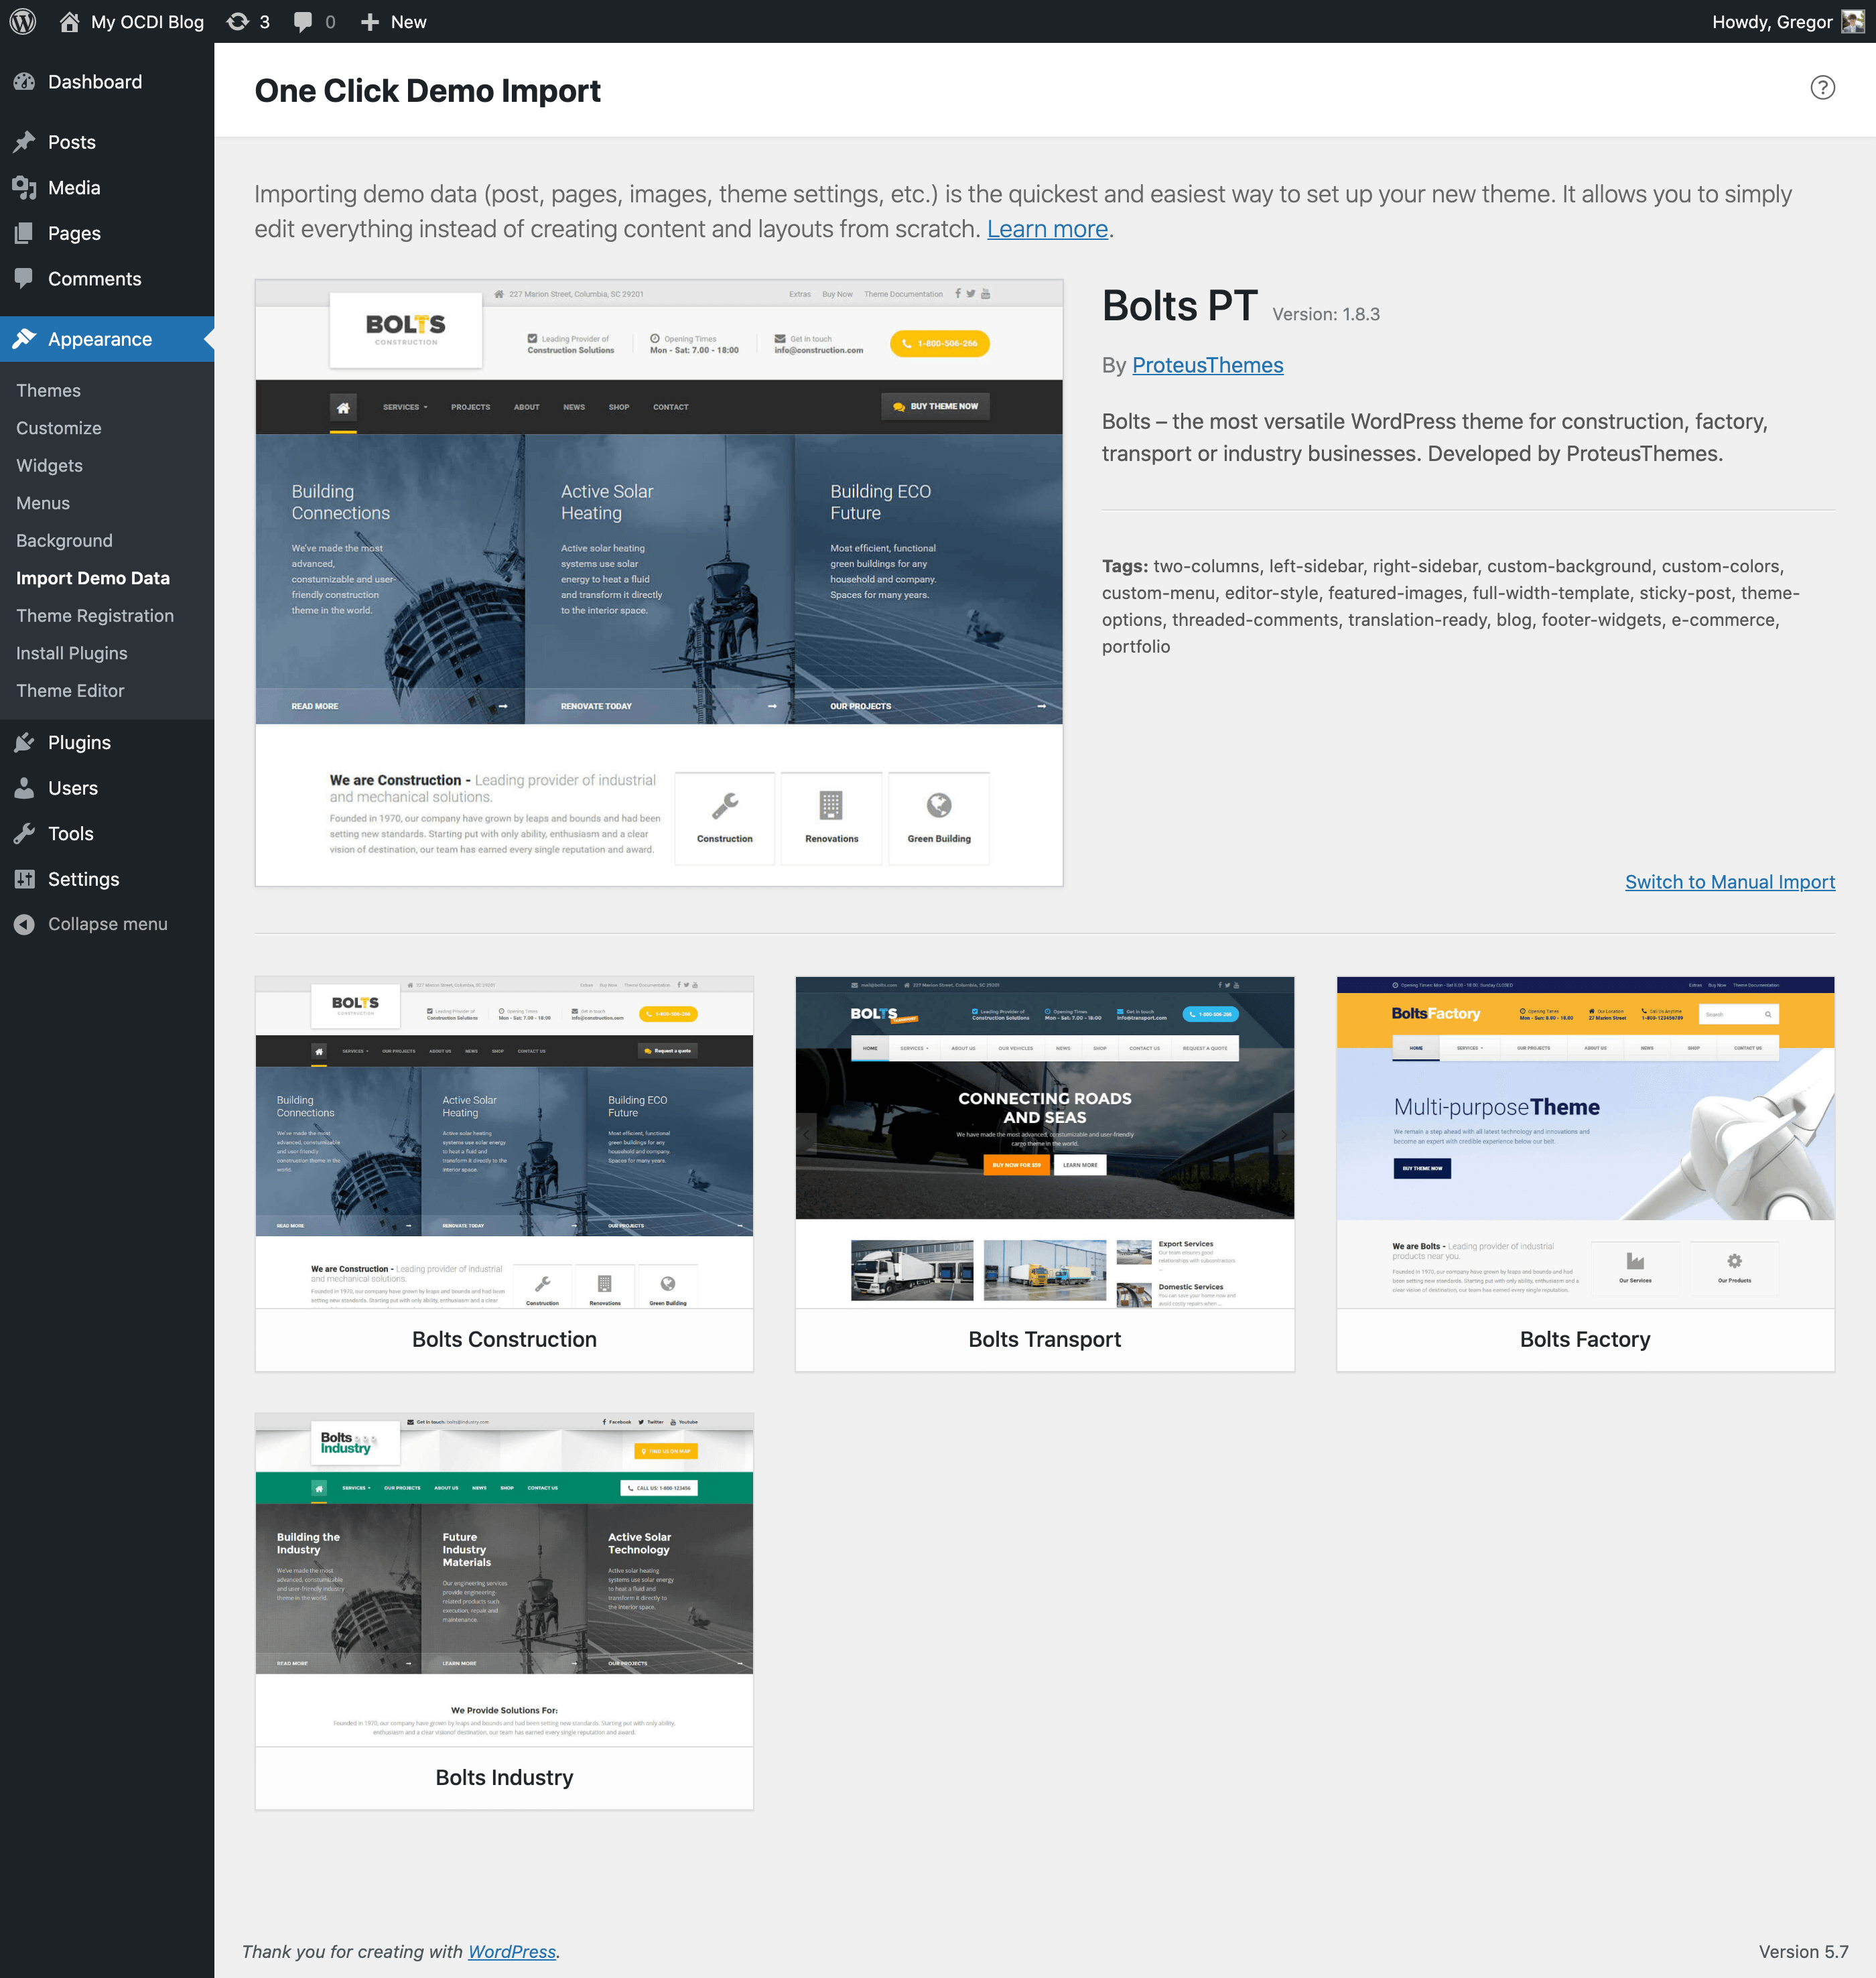
The best feature of this plugin is, that theme authors can define import files in their themes and so all you (the user of the theme) have to do is click on the “Import Demo Data” button.
Please take a look at our plugin documentation for more information on how to import your demo content.
Download
FAQ
I have activated the plugin. Where is the “Import Demo Data” page?
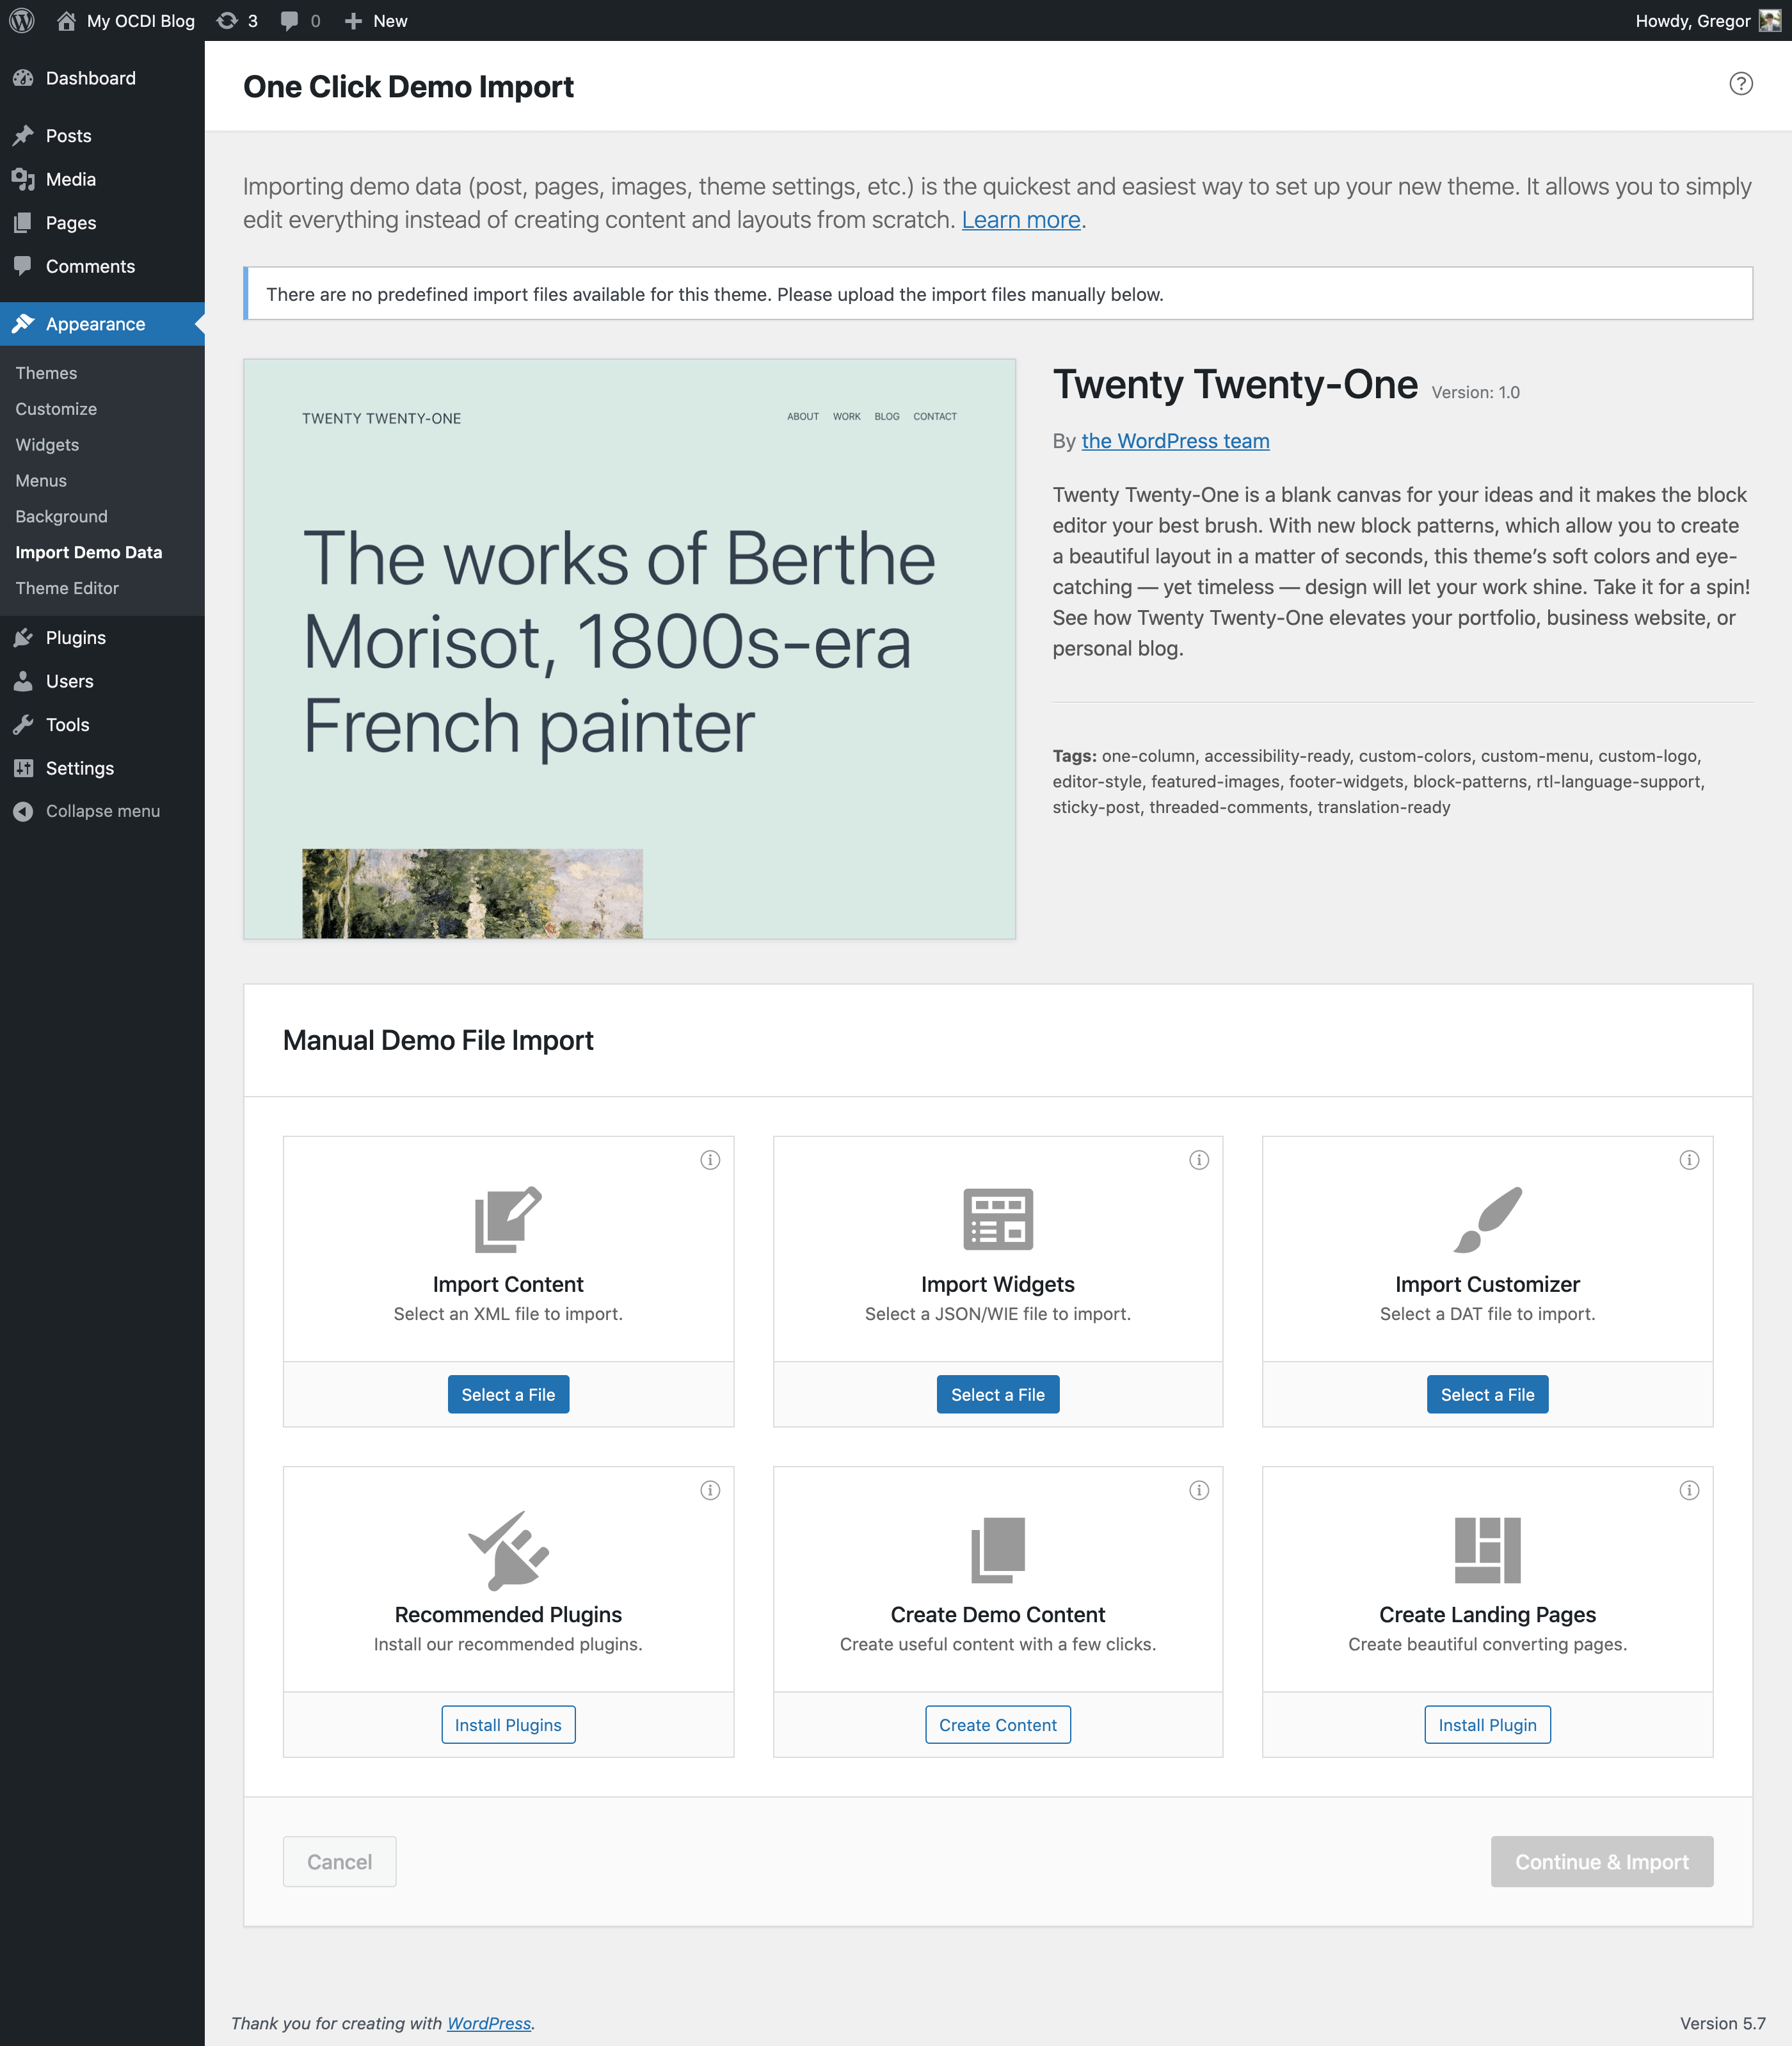
You will find the import page in wp-admin -> Appearance -> Import Demo Data.
Where are the demo import files and the log files saved?
The files used in the demo import will be saved to the default WordPress uploads directory. An example of that directory would be:
../wp-content/uploads/2016/03/.The log file will also be registered in the wp-admin -> Media section, so you can access it easily.
How to predefine demo imports?
This question is for theme authors. To predefine demo imports, you just have to add the following code structure, with your own values to your theme (using the
ocdi/import_filesfilter):function ocdi_import_files() return array( array( 'import_file_name' => 'Demo Import 1', 'categories' => array( 'Category 1', 'Category 2' ), 'import_file_url' => 'http://www.your_domain.com/ocdi/demo-content.xml', 'import_widget_file_url' => 'http://www.your_domain.com/ocdi/widgets.json', 'import_customizer_file_url' => 'http://www.your_domain.com/ocdi/customizer.dat', 'import_redux' => array( array( 'file_url' => 'http://www.your_domain.com/ocdi/redux.json', 'option_name' => 'redux_option_name', ), ), 'import_preview_image_url' => 'http://www.your_domain.com/ocdi/preview_import_image1.jpg', 'import_notice' => __( 'After you import this demo, you will have to setup the slider separately.', 'your-textdomain' ), 'preview_url' => 'http://www.your_domain.com/my-demo-1', ), array( 'import_file_name' => 'Demo Import 2', 'categories' => array( 'New category', 'Old category' ), 'import_file_url' => 'http://www.your_domain.com/ocdi/demo-content2.xml', 'import_widget_file_url' => 'http://www.your_domain.com/ocdi/widgets2.json', 'import_customizer_file_url' => 'http://www.your_domain.com/ocdi/customizer2.dat', 'import_redux' => array( array( 'file_url' => 'http://www.your_domain.com/ocdi/redux.json', 'option_name' => 'redux_option_name', ), array( 'file_url' => 'http://www.your_domain.com/ocdi/redux2.json', 'option_name' => 'redux_option_name_2', ), ), 'import_preview_image_url' => 'http://www.your_domain.com/ocdi/preview_import_image2.jpg', 'import_notice' => __( 'A special note for this import.', 'your-textdomain' ), 'preview_url' => 'http://www.your_domain.com/my-demo-2', ), );add_filter( 'ocdi/import_files', 'ocdi_import_files' );You can set content import, widgets, customizer and Redux framework import files. You can also define a preview image, which will be used only when multiple demo imports are defined, so that the user will see the difference between imports. Categories can be assigned to each demo import, so that they can be filtered easily. The preview URL will display the “Preview” button in the predefined demo item, which will open this URL in a new tab and user can view how the demo site looks like.
You can do that, with the
ocdi/after_importaction hook. The code would look something like this:function ocdi_after_import_setup() // Assign menus to their locations. $main_menu = get_term_by( 'name', 'Main Menu', 'nav_menu' ); set_theme_mod( 'nav_menu_locations', array( 'main-menu' => $main_menu->term_id, // replace 'main-menu' here with the menu location identifier from register_nav_menu() function ) ); // Assign front page and posts page (blog page). $front_page_id = get_page_by_title( 'Home' ); $blog_page_id = get_page_by_title( 'Blog' ); update_option( 'show_on_front', 'page' ); update_option( 'page_on_front', $front_page_id->ID ); update_option( 'page_for_posts', $blog_page_id->ID );add_action( 'ocdi/after_import', 'ocdi_after_import_setup' );What about using local import files (from theme folder)?
You have to use the same filter as in above example, but with a slightly different array keys:
local_*. The values have to be absolute paths (not URLs) to your import files. To use local import files, that reside in your theme folder, please use the below code. Note: make sure your import files are readable!function ocdi_import_files() return array( array( 'import_file_name' => 'Demo Import 1', 'categories' => array( 'Category 1', 'Category 2' ), 'local_import_file' => trailingslashit( get_template_directory() ) . 'ocdi/demo-content.xml', 'local_import_widget_file' => trailingslashit( get_template_directory() ) . 'ocdi/widgets.json', 'local_import_customizer_file' => trailingslashit( get_template_directory() ) . 'ocdi/customizer.dat', 'local_import_redux' => array( array( 'file_path' => trailingslashit( get_template_directory() ) . 'ocdi/redux.json', 'option_name' => 'redux_option_name', ), ), 'import_preview_image_url' => 'http://www.your_domain.com/ocdi/preview_import_image1.jpg', 'import_notice' => __( 'After you import this demo, you will have to setup the slider separately.', 'your-textdomain' ), 'preview_url' => 'http://www.your_domain.com/my-demo-1', ), array( 'import_file_name' => 'Demo Import 2', 'categories' => array( 'New category', 'Old category' ), 'local_import_file' => trailingslashit( get_template_directory() ) . 'ocdi/demo-content2.xml', 'local_import_widget_file' => trailingslashit( get_template_directory() ) . 'ocdi/widgets2.json', 'local_import_customizer_file' => trailingslashit( get_template_directory() ) . 'ocdi/customizer2.dat', 'local_import_redux' => array( array( 'file_path' => trailingslashit( get_template_directory() ) . 'ocdi/redux.json', 'option_name' => 'redux_option_name', ), array( 'file_path' => trailingslashit( get_template_directory() ) . 'ocdi/redux2.json', 'option_name' => 'redux_option_name_2', ), ), 'import_preview_image_url' => 'http://www.your_domain.com/ocdi/preview_import_image2.jpg', 'import_notice' => __( 'A special note for this import.', 'your-textdomain' ), 'preview_url' => 'http://www.your_domain.com/my-demo-2', ), );add_filter( 'ocdi/import_files', 'ocdi_import_files' );How to handle different “after import setups” depending on which predefined import was selected?
This question might be asked by a theme author wanting to implement different after import setups for multiple predefined demo imports. Lets say we have predefined two demo imports with the following names: ‘Demo Import 1’ and ‘Demo Import 2’, the code for after import setup would be (using the
ocdi/after_importfilter):function ocdi_after_import( $selected_import ) echo "This will be displayed on all after imports!"; if ( 'Demo Import 1' === $selected_import['import_file_name'] ) echo "This will be displayed only on after import if user selects Demo Import 1"; // Set logo in customizer set_theme_mod( 'logo_img', get_template_directory_uri() . '/assets/images/logo1.png' ); elseif ( 'Demo Import 2' === $selected_import['import_file_name'] ) echo "This will be displayed only on after import if user selects Demo Import 2"; // Set logo in customizer set_theme_mod( 'logo_img', get_template_directory_uri() . '/assets/images/logo2.png' ); add_action( 'ocdi/after_import', 'ocdi_after_import' );Can I add some code before the widgets get imported?
Of course you can, use the
ocdi/before_widgets_importaction. You can also target different predefined demo imports like in the example above. Here is a simple example code of theocdi/before_widgets_importaction:function ocdi_before_widgets_import( $selected_import ) echo "Add your code here that will be executed before the widgets get imported!";add_action( 'ocdi/before_widgets_import', 'ocdi_before_widgets_import' );How can I import via the WP-CLI?
In the 2.4.0 version of this plugin we added two WP-CLI commands:
wp ocdi list– Which will list any predefined demo imports currently active theme might have,wp ocdi import– which has a few options that you can use to import the things you want (content/widgets/customizer/predefined demos). Let’s look at these options below.wp ocdi import options:
wp ocdi import [–content=] [–widgets=] [–customizer=] [–predefined=]
--content=<file>– will run the content import with the WP import file specified in the<file>parameter,--widgets=<file>– will run the widgets import with the widgets import file specified in the<file>parameter,--customizer=<file>– will run the customizer settings import with the customizer import file specified in the<file>parameter,--predefined=<index>– will run the theme predefined import with the index of the predefined import in the<index>parameter (you can use thewp ocdi listcommand to check which index is used for each predefined demo import)
The content, widgets and customizer options can be mixed and used at the same time. If the
predefinedoption is set, then it will ignore all other options and import the predefined demo data.You can change the plugin intro text by using the
ocdi/plugin_intro_textfilter:function ocdi_plugin_intro_text( $default_text ) $default_text .= '<div class="ocdi__intro-text">This is a custom text added to this plugin intro text.</div>'; return $default_text;add_filter( 'ocdi/plugin_intro_text', 'ocdi_plugin_intro_text' );To add some text in a separate “box”, you should wrap your text in a div with a class of ‘ocdi__intro-text’, like in the code example above.
How to disable generation of smaller images (thumbnails) during the content import
This will greatly improve the time needed to import the content (images), but only the original sized images will be imported. You can disable it with a filter, so just add this code to your theme function.php file:
add_filter( 'ocdi/regenerate_thumbnails_in_content_import', '__return_false' );How to change the location, title and other parameters of the plugin page?
As a theme author you do not like the location of the “Import Demo Data” plugin page in Appearance -> Import Demo Data? You can change that with the filter below. Apart from the location, you can also change the title or the page/menu and some other parameters as well.
function ocdi_plugin_page_setup( $default_settings ) $default_settings['parent_slug'] = 'themes.php'; $default_settings['page_title'] = esc_html__( 'One Click Demo Import' , 'one-click-demo-import' ); $default_settings['menu_title'] = esc_html__( 'Import Demo Data' , 'one-click-demo-import' ); $default_settings['capability'] = 'import'; $default_settings['menu_slug'] = 'one-click-demo-import'; return $default_settings;add_filter( 'ocdi/plugin_page_setup', 'ocdi_plugin_page_setup' );How to do something before the content import executes?
In version 2.0.0 there is a new action hook:
ocdi/before_content_import, which will let you hook before the content import starts. An example of the code would look like this:function ocdi_before_content_import( $selected_import ) if ( 'Demo Import 1' === $selected_import['import_file_name'] ) // Here you can do stuff for the "Demo Import 1" before the content import starts. echo "before import 1"; else // Here you can do stuff for all other imports before the content import starts. echo "before import 2"; add_action( 'ocdi/before_content_import', 'ocdi_before_content_import' );How can I enable the `customize_save*` wp action hooks in the customizer import?
It’s easy, just add this to your theme:
add_action( 'ocdi/enable_wp_customize_save_hooks', '__return_true' );This will enable the following WP hooks when importing the customizer data:
customize_save,customize_save_*,customize_save_after.How can I pass Amazon S3 presigned URL’s (temporary links) as external files ?
If you want to host your import content files on Amazon S3, but you want them to be publicly available, rather through an own API as presigned URL’s (which expires) you can use the filter
ocdi/pre_download_import_filesin which you can pass your own URL’s, for example:add_filter( 'ocdi/pre_download_import_files', function( $import_file_info ) // In this example get_my_custom_urls` is supposedly making a `wp_remote_get` request, getting the urls from an API server where you're creating the presigned urls, [example here](https://docs.aws.amazon.com/sdk-for-php/v3/developer-guide/s3-presigned-url.html).// This request should return an array containing all the 3 links - `import_file_url`, `import_widget_file_url`, `import_customizer_file_url`$request = get_my_custom_urls( $import_file_info );if ( !is_wp_error( $request ) ) if ( isset($request['data']) && is_array($request['data']) ) if( isset($request['data']['import_file_url']) && $import_file_url = $request['data']['import_file_url'] ) $import_file_info['import_file_url'] = $import_file_url; if( isset($request['data']['import_widget_file_url']) && $import_widget_file_url = $request['data']['import_widget_file_url'] ) $import_file_info['import_widget_file_url'] = $import_widget_file_url; if( isset($request['data']['import_customizer_file_url']) && $import_customizer_file_url = $request['data']['import_customizer_file_url'] ) $import_file_info['import_customizer_file_url'] = $import_customizer_file_url; return $import_file_info;);
`I can’t activate the plugin, because of a fatal error, what can I do?
Update: since version 1.2.0, there is now a admin error notice, stating that the minimal PHP version required for this plugin is 5.3.2.
You want to activate the plugin, but this error shows up:
Plugin could not be activated because it triggered a fatal error
This happens, because your hosting server is using a very old version of PHP. This plugin requires PHP version of at least 5.3.x, but we recommend version 5.6.x or better yet 7.x. Please contact your hosting company and ask them to update the PHP version for your site.
Issues with the import, that we can’t fix in the plugin
Please visit this docs page, for more answers to issues with importing data.
Download Free One Click Demo Import Premium – One Click Demo Import is a Best WordPress Plugin Nulled
One Click Demo Import – Best WordPress Plugin Free Download Nulled – Premium SEO Tools | One Click Demo Import Nuled – Best WordPress SEO Plugin is a best Plugin for WordPress users. You can also optimize your content for SEO, and improve overall readability.
Free Vs Premium
One Click Demo Import Premium gives you features, Thats can help you blogging., social media previews,
One Click Demo Import Premium Cost, One Click Demo Import Premium Download, One Click Demo Import Premium Changelog, One Click Demo Import Premium Worth It, One Click Demo Import Premium Pricing , One Click Demo Import free Vs Premium, Activate One Click Demo Import Premium, Cost Of One Click Demo Import Premium
Difference Between Free And Premium
Buy One Click Demo Import Premium, Benefits Of One Click Demo Import Premium, How To Get One Click Demo Import For Free, Get One Click Demo Import Premium For Free,
- One Click Demo Import Premium Download By Link
- One Click Demo Import Premium Download Chrome
- One Click Demo Import Premium Download Codepen
- One Click Demo Import Premium Download Download
- One Click Demo Import Premium Download Extension
- One Click Demo Import Premium Download Hack
- One Click Demo Import Premium Download Keyword Tool
- One Click Demo Import Premium Download Latest Version
- One Click Demo Import Premium Download Mod
- One Click Demo Import Premium Download Old Version
- One Click Demo Import Premium Download Size
- One Click Demo Import Premium Download Template
- One Click Demo Import Premium Download Using Link
- One Click Demo Import Premium Download Url